I wanted to get Zoe a Cartwheel mat for Christmas, but I didn’t order it in time.
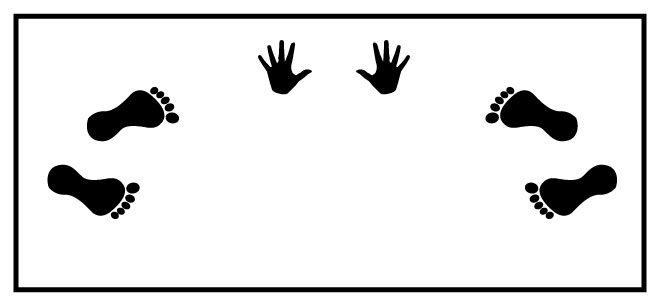
A carthwheel mat is a guide for someone learning to do cartwheels with hands and feet placement marks to show them what to do.

Example Cartwheel Mat
The prices range from 35 – 90+ on various sites for the same thing, but it all seemed a little more than what we needed.
I had been eyeing the yoga mats at our gym. They have plain purple and they are 8 dollars. So I did a little research about how to paint or mark on yoga mats. From what I could tell, you can use acrylic paints or maybe fabric paints, but you could also use sharpie permanant markers. I had some left over silver sharpies from an ornament craft we did over the holidays.
You can try it out for yourself!
Materials
- Plain yoga mat
- Sharpie
- Acrylic paint (optional)
- Printable Transparencies (optional)
- Exacto knife (optional)
1. Print the stencil pages of a hand and foot on transparencies. You can download it here. I used transparencies and an Exacto knife to cut them out because I had them on hand, but I can see a piece of paper or card stock working just as well. Make sure to use a self healing mat when cutting them out with the Exacto knife.
2. Measure the mat you purchased to see where the hands and feet best fit. I found the center and then moved out from there with the ruler. The width of all of the characters doesn’t have to be exact, but it should be evenly distributed and symmetrical.
3. Outline the hands with a Sharpie. Make sure the thumbs are facing into the center. Both hands are from the same stencil, you need only flip it over to get the other hand.
3. Measure out where to put the left set of feet. I chose about 7 inches from the bottom of the hand to the edge of the toe and about 6 inches from the top of the mat.
4. Outline the left set of feet. Remember the placement and slant of the second foot. I did this by comparing it to the edges of the mat.
5. Duplicate the same steps in the opposite placement for the right feet.

I don’t have a picture of the finished product, but I think you can see from the above picture what it looks like. Originally I was going to fill in hands and feet, but I really liked the clean look of the outline. I can see wanting to paint it with acrylic paint to make it all stand out. I did not do this, so I am not sure how it would turn out, but I did find sites that said acrylic paint should work fine on yoga mats.
Next weekend is Zoe’s birthday party so we will see what she thinks then!

